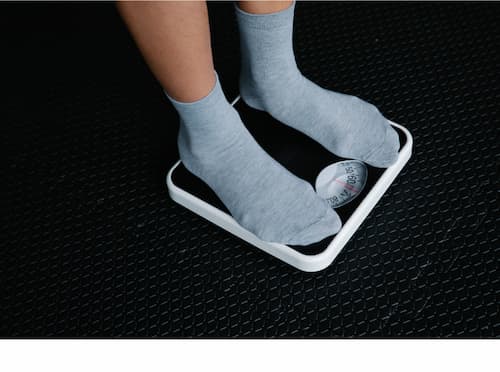
Maintaining accuracy in weight measurements is crucial for various reasons. Ensuring your Taylor scale is properly calibrated is a key aspect of achieving precise results.
Don’t worry if calibration sounds a bit complicated. We’re here to make it simple and easy to understand. We’ll show you why it’s important, when to do it, and exactly how to get it done.
Why Calibrate Your Taylor Scale
Imagine stepping onto your Taylor scale, excited to see how your efforts to exercise are paying off. But what if the numbers don’t match up with your efforts? Well, there’s a reason for that. Things like room temperature changes or how often you use the scale can mess up the numbers.
This is where calibrating your Taylor scale comes in handy. It’s like giving your scale a little adjustment to make sure it’s giving you accurate numbers. When you calibrate, you’re making sure that the numbers you see really reflect your progress.
This is super important if you’re working hard to reach certain goals, like getting healthier. Calibrating your scale helps you stay on track and know that you’re getting the real scoop on your progress.
When to Calibrate Your Taylor Scale
Okay, so you know that calibrating your Taylor scale is important. But how do you know when it’s time to give it a little attention?
Remember, your Taylor scale is a trusty tool on your health journey. To make sure it’s giving you the right information, keep an eye out for these signs and give it the calibration it deserves.
Here are some clues to look out for:
- Inconsistent Readings: If your scale is showing different numbers every time you step on it, that’s a sign it might need calibration. Consistency is key, and if your scale isn’t giving you the same numbers for the same weight, it’s time to recalibrate.
- Fluctuations: Have you noticed the numbers jumping around even when you’re not moving? That’s a sign your scale might need some tuning. Fluctuations can happen when the scale isn’t as accurate as it should be.
- Time Goes By: Just like any other gadget, your scale needs a check-up now and then. If it’s been a while since you last calibrated it, it’s a good idea to do it again.
Steps to Calibrate Your Taylor Scale
Let’s dive into the process of calibrating your Taylor scale. Don’t worry, it’s not as complicated as it might sound. Just follow these steps:
- Gather What You Need: First things first, collect the things you’ll need. You’ll want some objects with known weights; things like books, bags of rice, or even a dumbbell. These will help you calibrate your scale accurately.
- Choose a Good Spot: Find a flat and steady place for your scale. Make sure it’s clean and clear of any dirt or debris. A clean spot helps your scale work better.
- Turn the Scale On: Before you start the Taylor scale calibration, turn on your scale and wait until the display shows a zero reading. If there are any items on the scale, make sure to remove them.
- Put on the Known Weight: Now, place one of those known weights on the scale and see what number shows up. If it’s not what you expected, no worries, we’re going to fix it.
- Adjust the Calibration: Locate and press the ‘Calibration’ button on your scale. Depending on the model, this button might look like a rectangle, the letter ‘C,’ or a wrench icon. If you’re not sure which button to use, check your user manual or find product information online.
- Check Again: After you adjust, put the known weight back on. If the scale’s readings match the actual weights of the calibration weights, your scale is good to go. If the readings are a bit off, you might need to recalibrate a few more times until you get accurate results.
- Try Different Weights: Test your scale with a few different known weights. This makes sure it’s working well for all kinds of weights.
Common Causes of Calibration Problems and Troubleshooting
Calibrating your Taylor scale should be straightforward, but sometimes, issues can arise. Let’s dig into the common reasons for scale calibration hiccups and how to fix them:
1. Old Batteries
If your scale isn’t getting along with calibration, start with the basics – check the batteries. Over time, batteries can weaken, throwing off your scale’s accuracy. Swap out the old ones with fresh ones to see if that solves the issue.
2. Uneven Surface
Your kitchen scale’s performance can get wobbly if it’s on an uneven surface. Before you start measuring, ensure your scale is on a flat and level platform. This helps your scale show accurate numbers.
3. Overloading the Scale
Each scale has its limits. Going beyond that maximum weight can lead to calibration troubles. Before you pile on the ingredients, check your scale’s manual or the manufacturer’s website for its weight limit.
4. Moving or Transporting the Scale
If your scale has taken a tumble or a journey, it might need a reset. Moving around can mess with its internal workings. Try resetting and recalibrating to get it back on track.
5. Sensor Issues
Dust or debris on the sensors can impact calibration. Clean the weighing platform and sensors gently using a soft cloth.
Knowing when your scale isn’t behaving and using a few troubleshooting tricks is key. If all else fails, it might be time for a new scale. Go for a reputable brand with clear instructions and a user-friendly design.
FAQs
Here are answers to some common questions about Taylor scale calibration:
1. Why do I need to calibrate my scale?
Calibration ensures that your scale provides accurate measurements. Over time, factors like temperature changes or transportation can affect its accuracy. Calibrating maintains its reliability.
2. How often should I calibrate my Taylor kitchen scale?
The frequency depends on how often you use your scale and the manufacturer’s recommendations. If you use it frequently or notice discrepancies, calibrating every few months is a good practice.
3. How do I know if my scale needs to be calibrated?
If your scale displays inconsistent readings or gives different results for the same item, it might need calibration. Sudden changes in accuracy can also signal a need for calibration.
4. What should I do if my Taylor scale still isn’t measuring accurately after calibration?
If your scale is still off after calibration, recheck the calibration process. Ensure you’re using proper calibration weights and that the scale’s surface is even. If issues persist, consider contacting the manufacturer for assistance.
5. How do you fix an inaccurate digital weighing scale?
Start by recalibrating the scale following the manufacturer’s instructions. Check for proper weight placement and an even surface. If the problem persists, consult the user manual or reach out to the manufacturer’s support for guidance.
Calibrating your scale might seem small, but it’s a big deal for getting things right. Remember, calibrating isn’t something you do just once. Checking and fixing your scale regularly can help you keep it working well.
If you notice your measurements are a bit off, don’t worry. With this Taylor scale calibration guide you can solve common problems and get back on track.
Check out our guide on common smart scale error codes and how to fix them.